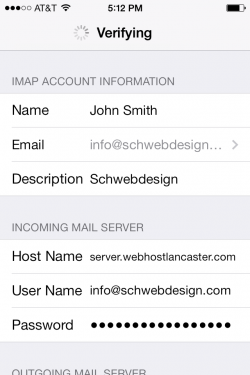
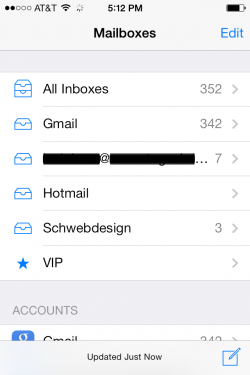
In a Nutshell:
The main things you need to set are:
- Be sure to enter your entire email address as your username and your password for BOTH incoming and outgoing setup.
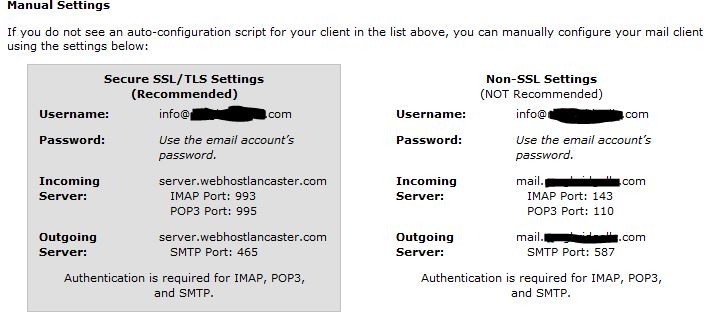
- Incoming/outgoing mail servers are both “server.webhostlancaster.com” if using SSL or “mail.yourdomain.com” if NOT using SSL. if you want to use SSL you MUST use server.webhostlancaster.com for the mail server.
- The correct port number for incoming & outgoing (refer to the “Manual Settings” information).
- Be sure to set that your outgoing mail ‘requires authentication.’ This is usually referred to ‘password’ under “Authenticaion” on the iPhone, iPad, etc.
Step-by-Step:
1) Find the settings you need.
Your email configuration settings can always be referenced from from either:
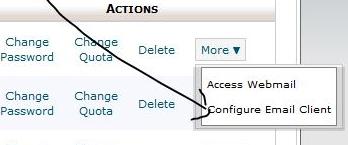
Please note the information under “Manual Settings” on this “Mail Client Configuration” page as it’s all you’ll need to know when setting up your device.
2) Add your account on your iPhone, iPad, or iPod
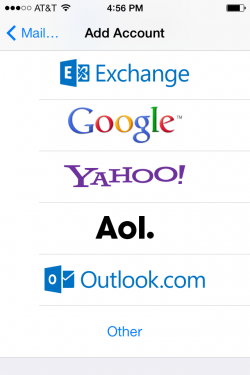
On your iPhone go to Settings > Mail Contacts Calendars > Add Account and choose “Other”
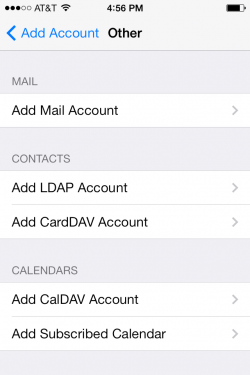
Choose “Add Mail Account”
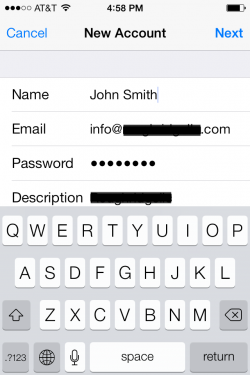
Enter all account details and click “Next”
Choose IMAP or POP, enter the rest of the configuration info here, and click “Next”
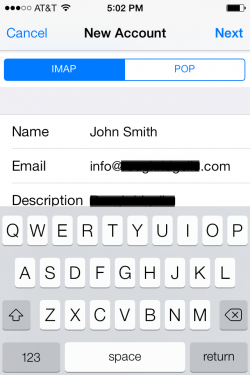
Decide if you’ll want to us IMAP or POP:
- IMAP is better if you’ll be checking/sending your emails across several devides like your iPhone, iPad, desktop and laptop. When you check mail from any device it will read the same inbox and show/sync the same items. IMAP is usually the best option but you’ll have to manually clean your inbox on the server when you can.
- POP is better if you’ll only be checking/sending your emails from this one device or don’t mind if the items get removed from the server. The inbox or other folders are not synced across devices and by default are removed from the server once you check your
Choose “IMAP” or “POP” at the top.
Decide if you’ll want to use SSL or no SSL:
- Using SSL is recommended and will ensure the security of emails you send or recieve by making suer they’re encrypted during transmission.
Enter the incoming & outgoing mail server hostnames.
Double check the correct incoming & outgoing ports are set.
- If you’ll be using IMAP:
- …and if using SSL:
- make sure the incoming mail port is 993. Your device will likely default to this.
- make sure the outgoing mail port is 465. Your device will probably not default to this (usually it will default to 25 or 587).
- … if NOT using SSL
- make sure the incoming mail port is 143. Your device will likely default to this.
- make sure the outgonig mail port is 587. Your device will probably default to this (but some devices will default to 25).
- …and if using SSL:
- If you’ll be using POP:
- …and if using SSL:
- make sure the incoming mail port is 995. Your device will likely default to this.
- make sure the outgoing mail port is 465. Your device will probably not default to this (usually it will default to 25 or 587).
- … if NOT using SSL
- make sure the incoming mail port is 110. Your device will likely default to this.
- make sure the outgonig mail port is 587. Your device will probably default to this (but some devices will default to 25).
- …and if using SSL:
Please note: must enter outgonig username and password even though it says optional
Your iPhone will say it is “Verifying” &/or “Adding account.”
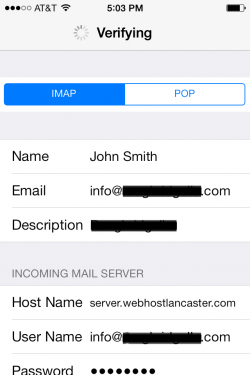
If the iPhone says it cannot veify server identity, double check there are no typos in what you entered and all the information is correct.
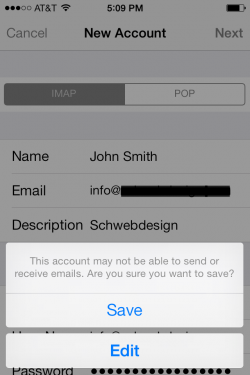
It may also say it cannot complete verification or cannot get mail; if so, that’s okay… because we still have some information we need to add that the interface only allows the after intial setep…
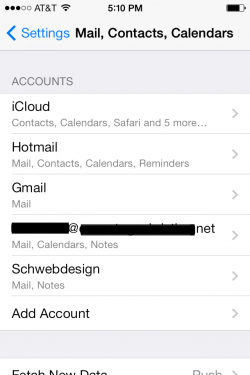
Go back to Settings > Mail, Contacts, Calendars to edit your account. Find your account in the list and click it.
.
Click your selected account name under “IMAP” ( or POP) at the top.
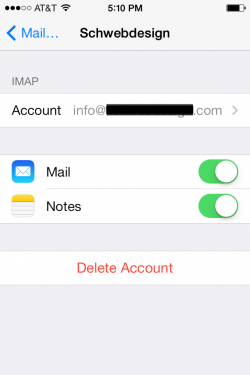
Here you can double check your email, password, and incoming/outgoing server names.
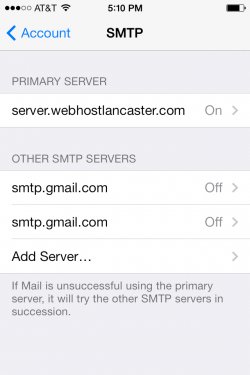
Scroll to the bottom and click “SMTP” under “Outgoing Mail Server”
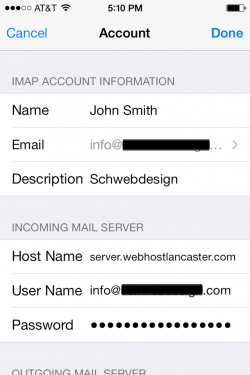
Click the item under “Primary Server”.
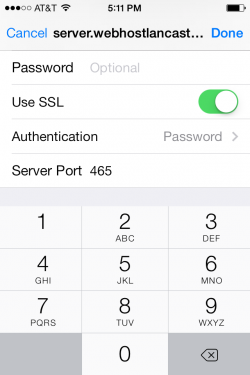
Make sure the “Password” is filled in. It may not work otherwise, despite saying ‘optional.’
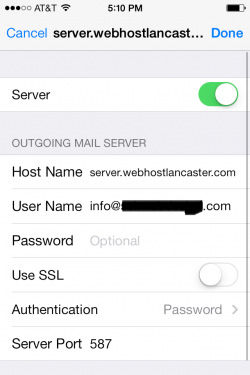
If using SSL (Recommended): make sure “Use SSL” is turned on, make sure Authentication is set to “Password”, make sure Server Port is 465.
If NOT using SSL, make sure “Use SSL” is turned off, make sure Authentication is still set to “Password,” and make sure Server Port is 587.
Click “Done.”
Now scroll to the bottom and click “Advanced”.
If you don’t see this option, go back to Settings > Mail, Contacts, Calendars to edit your account, find your account in the list and click it and, then your account at the top under IMAP (or POP), then scroll to the bottom.
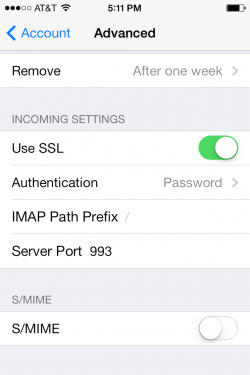
If using SSL (Recommended): make sure “Use SSL” is turned on, make sure Authentication is set to “Password”, make sure Server Port is 993.
If NOT using SSL, make sure “Use SSL” is turned off, make sure Authentication is still set to “Password,” and make sure Server Port is 143.
 ]
]
You’re done! You can now click “Done” to save. Your iPhone will verify again.
Go to the Mail app to test checking your email or sending an email.
